First Iodine and Bromine Daguerreotype

With bromine in the mix now, I couldn’t wait to make daguerreotype. I buffed out a test 1/4 plate and proceeded to fume over iodine to just beyond the first yellow and into a sepia/rose- it took about 2 minutes in a 63 degree ambient temperature. The was put over the bromine masked off into quadrants and fumed for 40seconds each. After the bromine the plate was again fumed over the iodine for 2/3 the time of the first iodine- about 90 seconds. The first exposure was for one minute at f3.5 using a 150mm lens and metered for ASA 100 and reduced it by 8 stops. The plate was developed for 168 degrees for 5 minutes. what I got was a faint image at the quadrant that received the least amount of bromine at 40 seconds——–shit!——–There is a fine line for bromine, too little or too much will decrease sensitivity. It seems the silica in the fume box is a bit strong.
Another plate was buffed. Right as I was almost done hand buffing the plate fell of the stand and landed face down onto the concrete——-shit again!——I dusted it off and hand buffed it a bit more. At 35-40 bucks per 1/4 plate there was no way that I was going to let a few scratches and dents keep me from using that plate. The plate was iodized same as the first and then I guessed how much bromine to give considering the results from the first plate. I gave it 20 seconds of bromine and then the plate got the second iodine.
The exposure was a little different for the second plate. I went ahead and gave the plate 11 stops instead of the 8 to compensate for the dark reddish color of the subject. 90 seconds was the exposure and after a 5 minute development the plate looked about 1.5-2 stops over exposed. It was not too bad a guess with the bromine and I got some really nice details in the shadow areas and in the wood grain. The highlight areas were a bit blown out but not too shabby for the first decent image ever using bromine, I went ahead with the gilding. I need some practice gilding as I think I got the plate too hot and it resulted in a weird brown spot and uneven marks on the plate. Aside for the dents and scratches, the bad gilding, and dust, I was very happy and took the plate home as a kind of milestone. The image is of my big baby 11 x 14 Deardorff “Daisy” on a century master studio stand with a Dallmeyer 3A.
No CommentsCharging silica with bromine
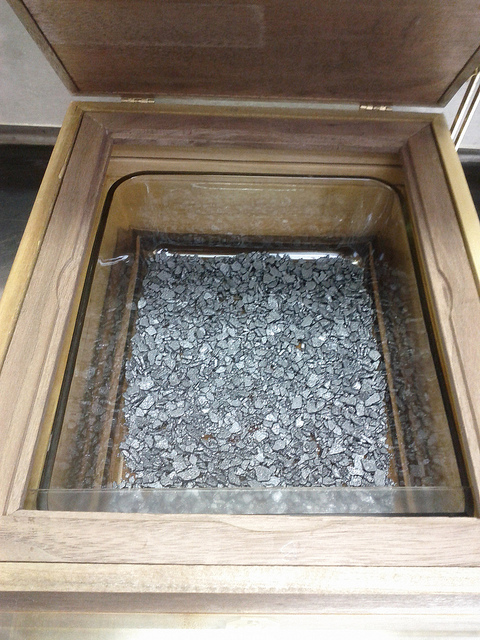
I tried to give the bromine as much respect as possible and had two ways of dealing with an accidental spill. I had a 500ml beaker filled with ammonia to neutralize as much of the bromine vapor as possible and I also had a 16 ounce container full of calcium hydroxide ready for any spills inside and outside the inside the fume hood. The operation was all done inside a stainless steel fume hood and the charging was done inside a gallon glass jar with a lid. Since bromine vapor is heavier than air minimal amounts of vapor were lost. First, about 5mls was poured into a small erlenmeyer flask and then transfered into a very shallow pyrex dish to allow the vapor charge the silica gel with the bromine vapor.
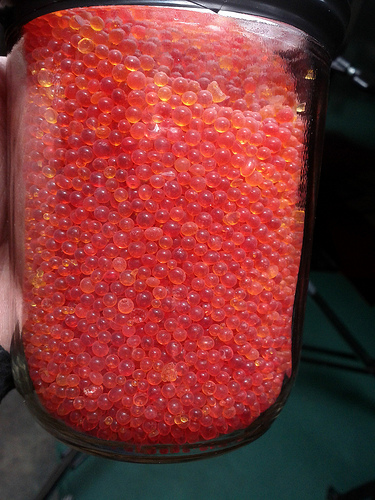
The fully charged silica resembles salmon eggs
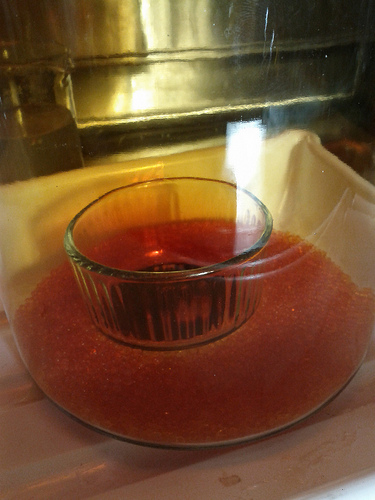
About 1/4 cup is was mixed with about 500grams of silica to make a working strength silica inside the fuming box. As you can see in the picture the working strength silica is very yellow/orange in color

Experiments
Two weeks before my son was born I managed to make a couple of daguerreotypes. Even though the silicone heating pad used to heat up the mercury was burned out on the temperature controller, I decided to put some mercury in the pot and heat up the mercury cup using a simple spirit lamp.

The temperature could still be monitored with the temperature controller thermocouple. I have to admit, heating up mercury is not something to be taken lightly and there danger not only for me but for my studio mates if there should be a spill or inadequate ventilation of the mercury vapor. Before the mercury every came to the studio I made sure there was a way to deal with a spill by purchasing a mercury spill kit and a used Bacharach MV2 mercury sniffer. The last essential piece of equipment is a full face respirator with the appropriate filters which will be purchased sooner than later. I found the mercury sniffer to be an incredibly useful tool as it allowed me to test the air inside the studio and the effectiveness of my fume hood. I found that the fume hood works perfectly and that no mercury vapor is present both inside the studio, in the wood shop outside the studio, or leaking from the ducting while the pot is at a working temperature of 176 degrees Fahrenheit. thank goodness…..

One thing that I discovered, even after the mercury pot has cooled and the mercury cup has been removed, the walls of the pot continue to emit dangerous levels of mercury vapor but the emission gradually falls off to very slight levels after a few days. The pot now gets put into an airtight container when not in use.
So the first 1/4 plate daguerreotype I made in my studio was of my Deardorff studio camera. The plate was buffed on the wheel then hand buffed using rouge only. The plate was then fumed over iodine to a rose/sepia color. I used the 8 x 10 Deardorff and a old Soviet 150mm f3.5 lens. The exposure was very much a guess and was exposed for 45 minutes in the studio using one 450 watt CFL fixture. I developed it for 6 minutes with the mercury at 170. The alcohol lamp keeps a constant temperature on the mercury pot but requires some fussing. It was overdeveloped a bit and has a light mercury frost on it but I got an image. This was scanned using my flatbed with some spacers to keep the plate from touching the glass.

The second 1/4 plate that I made a few days later was done almost exactly like the last one only I used a second hand buff with lamp black and was developed for 5 minutes at 170. The exposure was 30 minutes. The image is of a small golden cherub sculpture done by Dan Webb. I make it into the studio during the day on Mondays and he is always there working just outside his studio door. I noticed the sculpture a while back and thought it would make a good subject for a daguerreotype. The resulting plate had some areas where no image developed and I am still wondering what happened but I got a decent image for a second try. This image no longer exists as I did not do the final step of gilding and will be reusing the plate later.


Today I found out that my order of bromine will be coming in on Monday so I am very excited to get my exposure times down to a few seconds. Believe it or not, the bromine is the nastiest of chemicals involved in daguerreotypy. While the mercury is a neurotoxin that can build up in your system, it can be controlled with proper ventilation/containment. Bromine in its elemental state is an extremely corrosive vile red liquid that emits noxious clouds of thick red vapor at room temperature. Containment is an issue as it readily eats or corrodes most metals and even has a violent exothermic reaction with aluminum. If not properly handled, exposure to the liquid or vapors will cause severe burns and can cause death by destroying your lungs via severe pulmonary edema. Once I get the bromine to the studio it will be used to charge silica gel. The silica readily absorbs the chemical and so there is no elemental bromine used to fume plates and will be less volatile inside the fuming box.
I have have been off work since my son was born and am feeling a little tired. I have not had more than 3 hours of sleep at a time but I can’t complain. My wife, has had the same sleep schedule while having to breastfeed and recover from major surgery. I look forward to getting back into the studio soon and making some more images….. stay tuned
No CommentsSay Hello
Early on February 10th about 2 am in the morning, my wife wakes me up and informs me that she thinks her water broke. She called our doctor and they told us to come in immediately because we had found out earlier in the week that our little guy was in a breech position. We were both really groggy and a little stunned but quickly snapped out of our daze and managed to make it down to the hospital. When we got there, they checked us in and after about 30 minutes they informed us that they needed to do a C-section as soon as a doctor was available. They handed me some booties, a one piece coverall outfit, a mask and a surgical hat to wear and we were rushed into a very cold operating room. From the time we got in to the time my son was born was almost exactly two hours. Salvador Maxwell Carrillo was born 3weeks early at 5:10am on February 10th weighing in at a very svelte 5 lbs. 14 oz.

PCNW Show- Surface
Forgot to promote this but I have some work up at the Photo Center here in Seattle.
No Comments1.5 months till’ I become a dad!!
Here is my wife at a little over 7 months pregnant. The due date is February 29th- a leap year baby!
 Wet plate collodion ambrotype, 8 x 10 inches
No Comments
Wet plate collodion ambrotype, 8 x 10 inches
No Comments
Getting Close
A year after I took the daguerreotype workshop at the George Eastman House, I am about a month away from creating double sensitized mercurial daguerreotypes suitable for portaiture. I have loaded some Iodine into one of the boxes and it seems to work very well.
It is sitting in my fume hood slowly warming to room temperature so I can try a few becquerel dags hopefully on Wednesday. The other fuming box should work just fine with the bromine charged silica gel so the boxes seem to be ready to go. The mercury is on its way and it will probably show up tomorrow. The bromine proved to be the hardest to get but I have secured 500ml of the vile red liquid- It arrives in about a month or so.
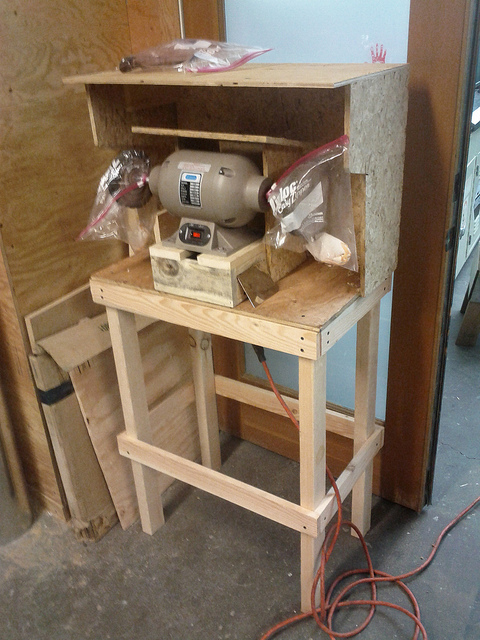
Today I made a new home for the buffing wheel so that is now checked off the list.
There are a few more things left to do like finishing the buffing paddles and setting up a small fume cupboard for the sensitizing boxes in the dark area. Thanks to Laurel Schultz I have the Iodine, a buffer and wheels, abrasives, velvet for the buffing paddles and some plates that simply need to be polished and sensitized. She really gave me the boost that I needed and I will be forever grateful for all her help.
No CommentsSeattle Magazine mention-Best Local Arts for 2011
Here is a little mention in Seattle Magazine. It put a big smile on my face when I read it and I have to thank Hayley Young (Seattle Magazine staff phorographer) and Sue Boylan (Seattle Magazine Art Director) for this. I suspect they had something to do with this.
Most Beloved Local Photographer: Daniel Carrillo
Our favorite Seattle photographer doesn’t use the latest technology. His photos aren’t the crispest, or cleanest, or most colorful. But that’s exactly what makes his portraits so appealing. For the past two years, Daniel Carrillo has been documenting Seattle’s artistic community via gorgeous portraits taken using the “wet plate collodion” method, which was invented in 1850 and involves a giant, accordion-style camera, glass plates and extremely slow exposures. And while Carrillo (who has also shot portraits for Seattle magazine features) is hooked on this old-school approach, he doesn’t hesitate to acknowledge the new-school way his work gained acclaim: on Facebook.
No Comments